Click Here For Free Blog Backgrounds!!!
Blogaholic Designs
Showing posts with label paint. Show all posts

Thursday, July 17, 2014

Hope Signs


I have two friends who are crazy about everything Nautical. So I wanted to make something for them, and decided on these signs. I love how they turned out. I used paint tape to do the stripes, and vinyl to make a stencil for the letters and anchors.

Tuesday, January 7, 2014

Turkey Craft

Here is our Thanksgiving handprint/footprint turkey. Emmett had a lot of fun making it this time!


Turkey

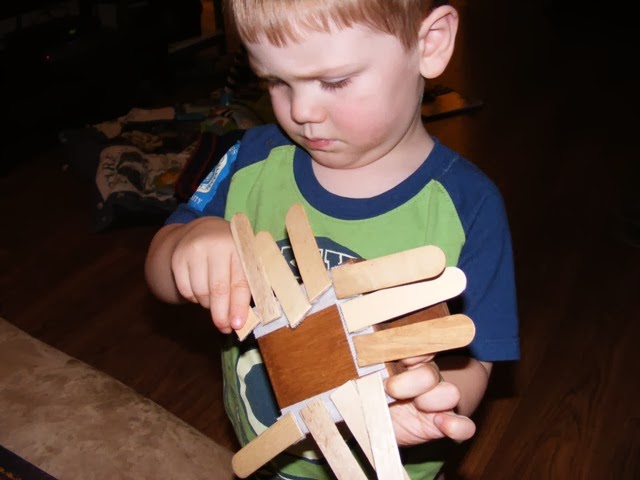
I saw this idea on pinterest, but I changed it a bit so the turkey could be one that Emmett played with. It's hard when I pull out decorations and he isn't allowed to touch them, so this was perfect! I used a small piece of a 2x4, the top part of a paint stick, velcro, and the tongue depressors. I also used paint and scrapbook paper that I already had. He loved putting feathers on his "turtey."


Tuesday, August 20, 2013

Bulletin Board Frames

Last summer, I went to Goodwill looking for frames for some type of gallery wall in E's room. I walked in and found 4 frames that fit pretty well together. What are the chances in one trip?? They sat in his closet for a year, and now that we've moved the baby stuff out of his room he needed something on the wall. I decided to make little bulletin boards using cork (bought in a big roll). I painted the frames and put in the cork. Cam had to help me glue down the cork so it wouldn't roll back up (my fault for buying it a year ago). He also helped me hang them on the wall. I like them, except for the fact that the cork isn't very deep so the pins are hard to put on. As long as E doesn't mess with them, we're good!


Sunday, August 4, 2013

Flower Wall Hooks

This project made me so happy, because I was able to use up some things from my craft closet! I had all the materials for this project, except for the white hooks. The flowers I picked up a long time ago, and I used scraps of fabric and paint I already had.

First, I painted the flowers. Then I cut squares of fabric and ironed on some interfacing so that the fabric would be easier to cut. Then, I used the template, traced the flowers, and cut them out. I pulled the interfacing off and used a light coat of mod podge to glue the fabric inside the flowers. Then, with the help of my handy husband, we drilled some holes through the flowers and put them into the wall. (He would want me to add that he used sheet rock anchors on one hole for each hook.)

I love how they turned out, and I am so glad to finally have a place to hang her towel!


Tuesday, July 16, 2013

Wooden Puzzles

I ordered these from pickyourplum.com and finally got around to putting them together. The kits came with all the pieces, I just had to find paper to put under each letter and then paint it. I used scrapbook paper with small pictures, mostly animals, trucks, trains, etc. I mod podged them to the bottom piece of wood, painted the top piece with the name cut out, painted all the pieces and knobs. Then I put a coat of polyurethane on the black because it seemed to be getting scratched easily. Last, I used wood glue and some clamps to glue it all together. I think they turned out great!


Sunday, July 14, 2013

Washi Tape Frame

I saw the idea for this frame here. I got most of the washi tape from pickyourplum.com and finished the frame very quickly. I painted the frame, lined up the washi tape on the front, trimmed the excess off, put a layer of mod podge on, and added a felt flower.

Colorful Dot Mat

I bought a print by the same artist on etsy (here) for E's nursery, so I wanted one for Baby S too. It needed a mat, and my mom saw this idea in HGTV magazine. They used ink pads, but I just used craft paint. You take pencil erasers and make dots all over. It took some practice to get the right amount of paint on the erasers so they'd be nice, neat circles. I love how it turned out!


$1 frame

I've posted these before, but I wanted to add the latest one to display with these at school. Isn't she precious?!


Friday, January 25, 2013

Laundry Room Change Holder

I'm horrible about checking pockets when I do laundry. And when I do remember, I throw change and stuff into a little plastic tub. I saw this idea on pinterest, and had all the supplies I needed. Thank goodness for a husband who keeps scraps of wood in the garage! I had an extra clamp from my key rack project. I used my cricut to cut the vinyl. Maybe now I'll remember to check pockets with my reminder by the washer!


Friday, January 18, 2013

Frame

I absolutely loved how this picture of E and his "aunts" came out, so I had to make a frame for them.


Sunday, January 13, 2013

Wooden Letters

These letters have been in my craft closet for probably 2 years, maybe 3! I finally got around to decorating them. I had all the scrapbook paper, and found the cute felt buttons at Wal-Mart! I was worried how it would look on my mantle with the red wall, but it actually looks decent in person! Hooray for finishing VERY old projects!


Thursday, December 27, 2012

Toy Workbench

My dad and Cam did the building on this project, I just gave them a little input about what I wanted. I painted it all and added the vinyl hammers and screwdrivers (thank you cricut!). I love how it turned out, and E hasn't stopped playing with it and all his tools!


Christmas decoration

At our church activity they had extras of these vinyl words, so I decided to make a quick little decoration. I painted the board, put scrapbook paper on, added the word, and then tied some ribbon on. Easy peasy!


Nativity Board

I saw the vinyl for this project on sale on a blog, and I ordered a few sets. She had used it for separate pieces for stocking holders, but I wanted to use it for one big board. I love how they turned out - if I had only ordered a few more!

It was a very quick project - stain the board, rub a candle on the edges, paint the board, sand to distress, put the vinyl on!


Wednesday, October 10, 2012

Dry Erase Countdown

I saw an idea for a Halloween countdown, and found this jack-o-lantern on one of my cricut cartridges. Perfect! It looks really cute on the mantle! And it only cost me $1 because I had everything else I needed to finish it!